
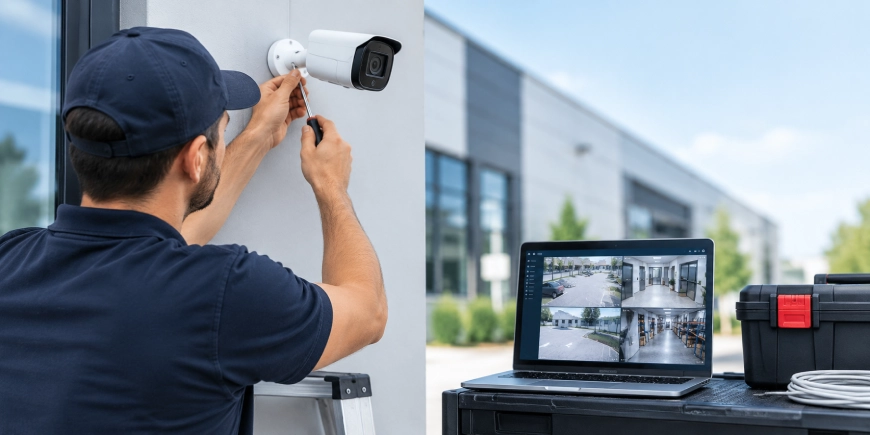
A security camera system can help businesses and property owners monitor entrances, protect valuable areas, investigate incidents and improve overall visibility. But good results depend on more than simply mounting cameras on walls.
A successful installation starts with planning the coverage, selecting suitable equipment, designing the network, protecting the recording system and testing everything after installation. A professional security camera installation company in Canada can help bring these pieces together into one reliable system.
This guide explains the main steps involved in planning and installing a security camera system for homes, offices, commercial properties and industrial facilities.
1. Start With a Security Assessment
Before buying cameras, identify what you actually need to monitor.
Walk around the property and identify important areas such as:
- Main entrances and exits
- Parking areas
- Loading docks
- Reception areas
- Hallways
- Storage rooms
- Perimeters
- Cash-handling areas
- Restricted-access locations
Think about what the camera needs to accomplish. A camera intended to identify a person’s face requires different positioning from one intended to monitor a large parking lot.
The objective is useful coverage, not simply installing as many cameras as possible.
2. Choose the Right Security Cameras
Different locations require different camera types.
Bullet Cameras
Bullet cameras are often useful for outdoor areas and locations where a more visible camera presence is desirable.
Dome Cameras
Dome cameras have a compact design and are commonly used indoors, offices, retail spaces and other areas where a less noticeable installation is preferred.
PTZ Cameras
Pan-tilt-zoom cameras can move and zoom, making them useful for monitoring large areas. However, a PTZ camera should not automatically replace fixed cameras because it may not continuously view every area.
IP Cameras
IP cameras transmit video through a network and are widely used in modern surveillance systems. Many can use Power over Ethernet (PoE), allowing compatible cameras to receive data and power through one network cable.
3. Plan Camera Placement Carefully
Camera placement can make or break a surveillance system.
Avoid pointing cameras directly toward strong light sources whenever possible. Sunlight, headlights, reflective surfaces and bright indoor lighting can reduce image quality.
For each camera, check:
- Desired viewing direction
- Mounting height
- Field of view
- Lighting conditions
- Potential obstructions
- Required identification distance
- Cable route
- Maintenance access
For entrances, position cameras so people approaching the property can be captured clearly rather than relying only on a wide overhead view.
4. Decide How Video Will Be Recorded
Cameras need somewhere to store recorded footage.
A common commercial setup uses an NVR (Network Video Recorder). Depending on the system, video may also be stored using cloud services or a hybrid combination of local and cloud storage.
Consider:
- Number of cameras
- Camera resolution
- Continuous or motion-based recording
- Required retention period
- Storage capacity
- Backup requirements
- Remote access
Higher-resolution cameras and continuous recording generate more data, so storage requirements should be calculated before equipment is selected.
5. Design the Cabling and Network
For a wired system, cabling should be planned before cameras are installed.
The installation may require:
- Cat5e, Cat6, or other appropriate Ethernet cabling
- PoE switches
- Patch panels
- Network racks
- Fiber optic links for longer backbone connections
- Cable trays or other pathways
- Proper cable labeling
Cable length, network capacity, PoE power requirements and the location of network equipment all matter.
Poor cabling can cause intermittent camera connections, packet loss, video dropouts, or complete camera failure.
6. Install and Secure the Cameras
Once the design is finalized, cameras can be mounted and connected.
A professional installation should pay attention to:
- Stable mounting
- Weather protection for outdoor cameras
- Correct cable termination
- Protected cable routes
- Proper camera angle
- Secure network connections
- Equipment accessibility
Outdoor cameras should be suitable for their environmental conditions. Cables and connections should also be protected from physical damage and moisture where necessary.
7. Configure the Recording System
After cameras are connected, configure the NVR or selected recording platform.
Important settings include:
- Camera names
- Date and time
- Recording schedule
- Motion detection
- Retention settings
- User permissions
- Recording resolution
- Frame rate
- Storage allocation
Correct timestamps are particularly important. If footage is needed after an incident, inaccurate dates or times can make finding the relevant recording much harder.
8. Configure Remote Access Securely
Many property owners want to view cameras from a phone, tablet, or computer.
Remote access can be useful for:
- Checking a property after hours
- Reviewing an incident
- Monitoring multiple locations
- Receiving alerts
- Managing authorised users
Security should be considered carefully when enabling remote access. The Cybersecurity and Infrastructure Security Agency (CISA) recommends practices such as changing default passwords, keeping devices updated and reducing unnecessary exposure of connected systems. (cisa.gov)
Use strong credentials and give users only the access they actually need.
9. Test Every Camera After Installation
Never assume the system is finished simply because every camera appears on the monitor.
Test each camera during both daytime and nighttime conditions.
Check:
- Image clarity
- Camera angle
- Field of view
- Night vision
- Recording
- Playback
- Motion detection
- Notifications
- Remote viewing
- Network connectivity
Walk through important areas and confirm that people and vehicles remain visible where expected.
Also test recorded footage rather than checking only the live view.
10. Check for Blind Spots
A blind spot is an area where a person or event can occur without being properly captured.
Common problem areas include:
- Behind doors
- Around building corners
- Between parked vehicles
- Under overhangs
- Near loading areas
- Alongside entrances
After installation, physically walk the property while watching the camera views. This simple test often reveals problems that are difficult to notice from a floor plan.
11. Document the Installation
A professional security camera system installation service should not end with equipment being switched on.
Keep records of:
- Camera locations
- Camera models
- IP addresses or network assignments
- NVR details
- Cable labels
- Recording settings
- User permissions
- Storage capacity
- Test results
- Warranty information
Documentation makes future troubleshooting and system expansion much easier.
12. Plan for Maintenance
Security cameras operate continuously, so they need occasional attention.
A basic maintenance routine should include:
- Cleaning camera lenses
- Checking camera positioning
- Reviewing recording status
- Checking storage health
- Installing approved firmware updates
- Testing remote access
- Reviewing user accounts
- Checking cables and connections
- Testing alerts
Outdoor cameras may need more frequent inspection because dust, weather, insects and other environmental conditions can affect image quality.
Security Camera System Installation in Halifax, Ottawa and Calgary
The installation process is broadly similar across Canada, but every property has different requirements.
For security camera system installation in Halifax, existing buildings may require careful planning around current cabling and construction.
In Ottawa, offices, institutional facilities and commercial properties may need extensive network and access control integration.
For security camera system installation in Calgary, warehouses, industrial properties and larger sites may require longer cable runs, additional network infrastructure and cameras designed for demanding environments.
The right design should always be based on the property, not simply on a standard camera package.
How to Choose a Security Camera System Installation Company
Before hiring an installer, ask practical questions:
- Will the installer assess the property before recommending equipment?
- How will camera coverage be determined?
- Will the system be tested after installation?
- What type of recording and storage is recommended?
- How will remote access be secured?
- Will cable routes and equipment be documented?
- Can the system be expanded later?
- What support is available after installation?
A trustworthy security camera system installation company should explain the reasons behind its recommendations instead of simply selling a fixed number of cameras.
Conclusion
A reliable surveillance system is the result of good planning, correct equipment, careful installation, secure configuration and thorough testing.
Whether you are protecting a small business, warehouse, office, residential property, or large commercial facility, focus on coverage and reliability rather than simply the number of cameras installed.
AlfaDefence.io helps property owners and businesses plan security camera infrastructure around their actual security needs, network environment, recording requirements and future expansion.
A properly installed system should be easy to use, dependable during everyday operation and ready when recorded footage is needed.
FAQs
- How do I start installing a security camera system?
Start by assessing the property and identifying important areas that need monitoring. Then determine camera types, placement, recording requirements, cabling, network capacity, storage and remote-access needs. Testing should be included after installation to confirm coverage, recording, image quality, alerts and system reliability.
- How many security cameras does my business need?
There is no fixed number because requirements depend on the property’s size, layout, entrances, risk areas, lighting and desired coverage. A professional security camera system installation company should assess the site and identify priority areas before recommending camera quantities or specific equipment.
- What is needed for a security camera system installation?
A typical IP system may require cameras, Ethernet cabling, PoE switches, an NVR or cloud storage, network equipment, mounting hardware, storage drives and suitable power infrastructure. The exact components depend on camera count, resolution, recording requirements, building layout and whether remote monitoring is required.
- Should security cameras be installed inside or outside?
Most properties benefit from a combination of indoor and outdoor cameras. Outdoor cameras can monitor entrances, parking areas, loading zones and perimeters, while indoor cameras can cover reception areas, hallways, storage spaces and restricted areas. Each camera should be selected for its specific location and lighting conditions.
- How much does security camera system installation cost?
Installation costs vary according to camera quantity, resolution, cable length, mounting difficulty, storage capacity, network equipment and site conditions. Large commercial installations generally require more infrastructure than small systems. A site assessment provides a more accurate estimate than choosing equipment based only on camera price.
- Can I access my security cameras remotely?
Yes. Many modern systems support remote viewing through an authorized mobile application or web interface. Remote access should be configured securely with strong credentials, appropriate user permissions, current software and secure network settings. The installer should test remote viewing and notifications before completing the project.
- Do security cameras need maintenance after installation?
Yes. Regular checks can help maintain image quality and system reliability. Maintenance may include cleaning lenses, checking camera angles, reviewing storage health, testing recording and remote access, updating approved firmware, inspecting connections and reviewing user permissions. Outdoor cameras may require more frequent physical inspection.